Perform Alert Tuning and Minimize False Positives in SOC

Business Scenario
Welcome!
You have successfully completed your SOC Alert Tuning and False Positive Reduction lab.
In this lab, you have: Understood alert tuning, Reviewed security alerts, Reduced false positives, Improved alert accuracy
You are now ready to move to the next stage of SOC monitoring and threat detection.


Pre-Lab Preparation
Topic : Incident Response and Investigation
1) Introduction to SIEM tools such as Splunk and Wazuh
2) Alert triaging and investigation process
3) Threat detection techniques
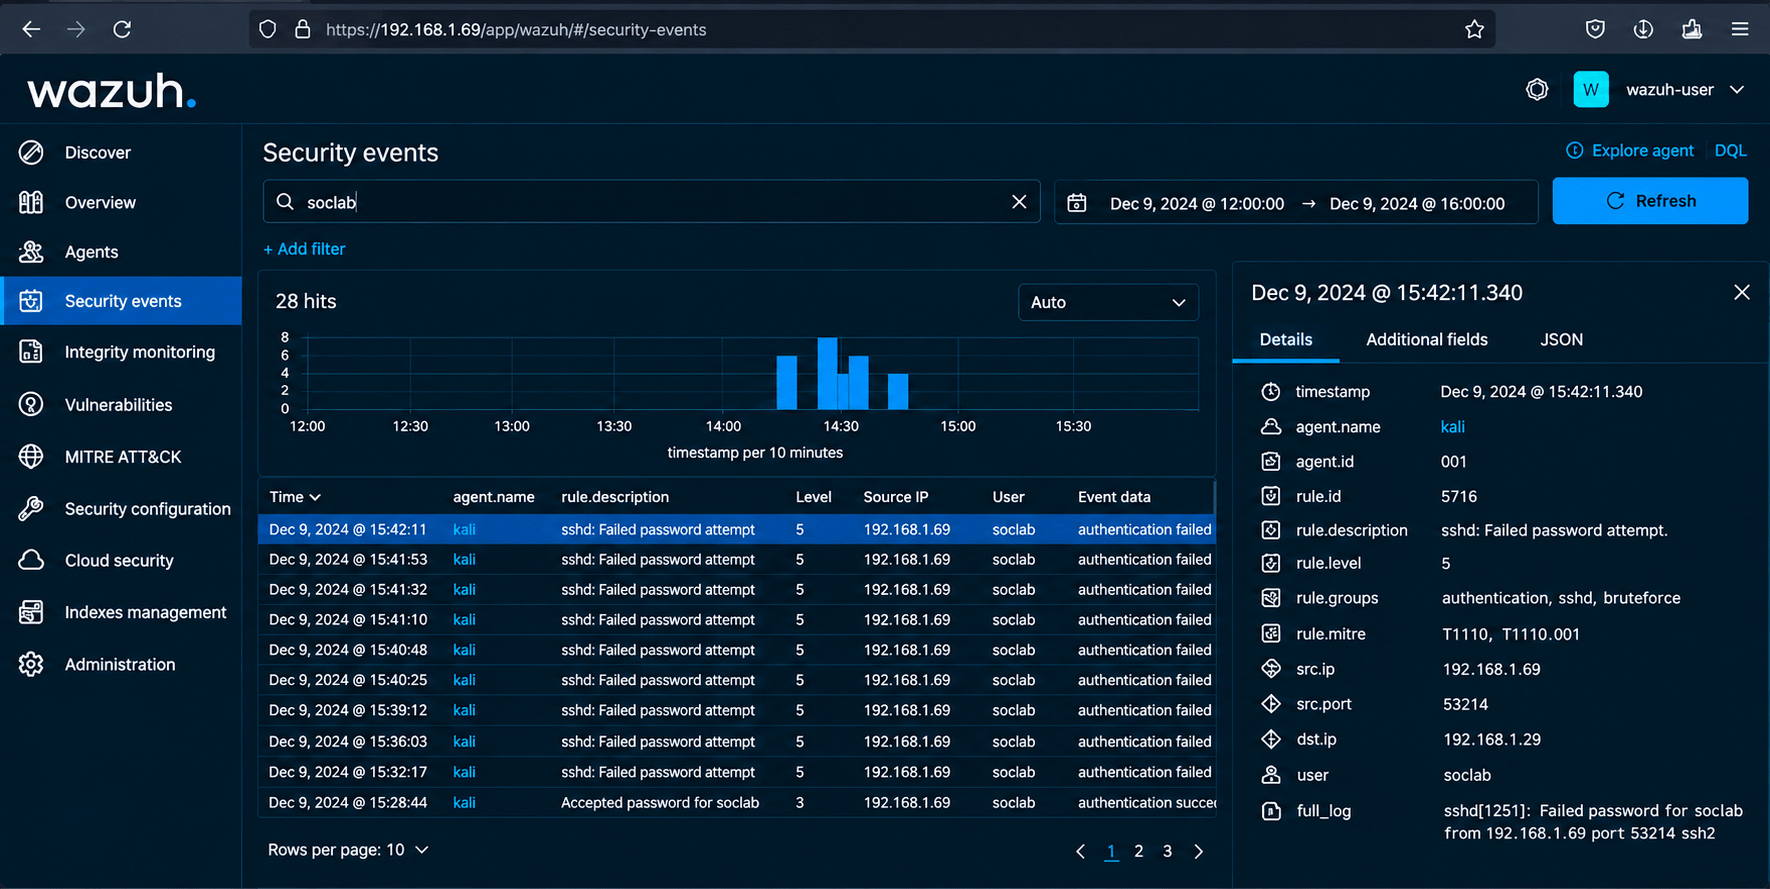
Task 1: Review SOC Alerts
Understand why alerts are being generated.
1
Steps
a
-
Open the SIEM dashboard.
-
Navigate to Alerts/Security Events.
-
Select the assigned alerts.
-
Record:
-
Alert name
-
Source
-
Timestamp
-
User
-
Severity
-
Number of occurrences
-
-
Review the event details.
-
Open the SIEM dashboard.
-
Navigate to Alerts/Security Events.
-
Select the assigned alerts.
-
Record:
-
Alert name
-
Source
-
Timestamp
-
User
-
Severity
-
Number of occurrences
-
-
Review the event details.
Task 2: Identify False Positives
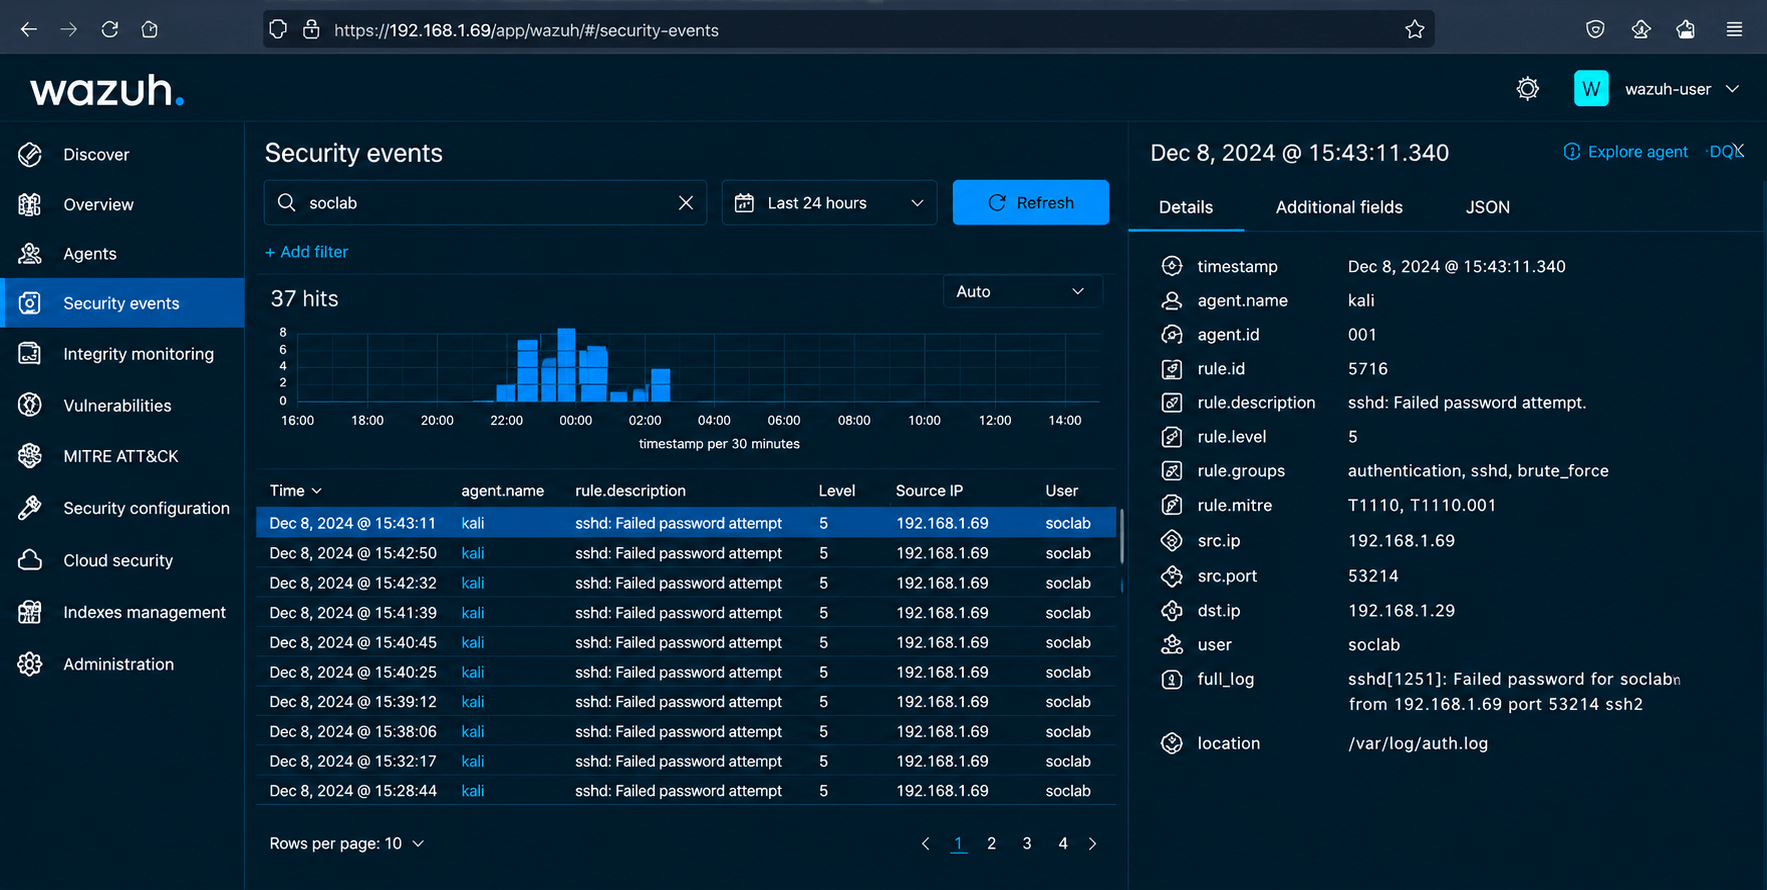
Determine which alerts are caused by legitimate activity.
1
Steps
a
-
Select an alert.
-
Review the related logs.
-
Check whether the activity was expected.
-
Compare it with the test scenario.
-
Classify the alert as:
True Positive
OR
False Positive
Task 3: Identify the Cause
Task 1: Understanding BRD
Before you start building anything, you need to clearly understand what the client actually wants.So, let’s begin by understanding the BRD (Business Requirement Document) shared by the client.
BRD Full Form is Business Requirement Details.BRD like a plan for building a house. This plan helps the builder understand what to build.In the same way,BRD tells developers what the client wants to build
Click to download BRD : BiteBox_BRD.pdf
Activity
After going through BRD list down the Core Features and Web Pages in the tabulated Format as shown Below.
| Col 1 | Col 2 | Col 3 |
|---|---|---|
| Row 1 | ||
| Row 2 | ||
| Row 3 |
Formula
Profit = Revenue - Cost
Task 2: Create WireFrame
Now that you understand the requirements, don’t jump into coding yet. Before development, we always visualize the layout.
Now lets create a simple wireframe for the homepage.
A wireframe is like a layout plan of a house. Before building, you decide where rooms, doors, and windows will be placed.Similarly, a wireframe helps you plan where elements like headers, images, and buttons will appear on a webpage—before adding design or colours.
Task 3: Code Editor Installation
Good work on completing the planning phase.
Now we will start development. Before that, make sure your system is ready with the required tools.
In this step we will install the VS code editor that will help to Write code efficiently,Organize files , Run and test your application
Go to the visual studio code official website
1
Click to download Homepage Wireframe : Homepage Wireframe
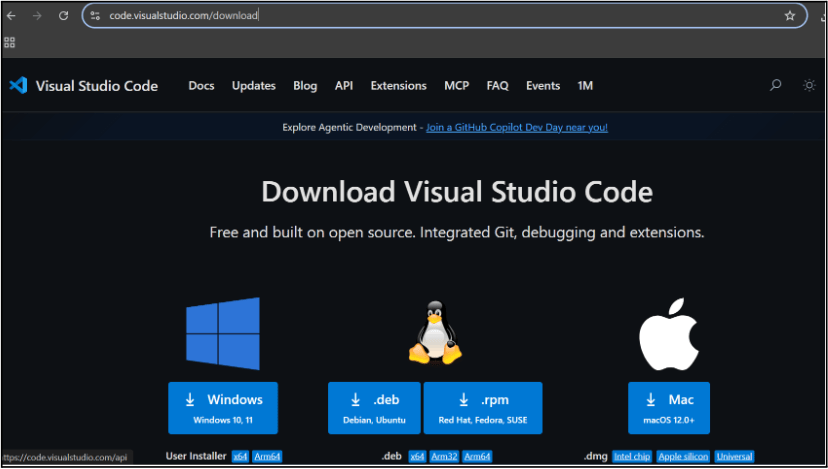
Choose your operating system(windows / Mac) and download the installation file.
Double click on the download app and Accept the agreement and click next
2
It is a long established fact that a reader will be distracted
b
Sub Steps
a
Double click on the download app and Accept the agreement and click next
public class MathSample {
    public static void main(String[] args) {
        int x = 10;
        int y = 20;
        int sum = x + y;

        System.out.println("The sum is: " + sum);
    }
}
public class MathSample {
public static void main(String[] args) {
int x = 10;
int y = 20;
int sum = x + y;
System.out.println("The sum is: " + sum);
}
}
public class MathSample {
public static void main(String[] args) {
int x = 10;
int y = 20;
int sum = x + y;
System.out.println("The sum is: " + sum);
}
}
Great job!
You have successfully completed your first lab on BiteBox Project Onboarding.
In this lab, you have: Understood the BRD, Created a wireframe, Set up your development environment, Organised your project structure, Run your first program
You are now ready to move to the next stage of development
Checkpoint

Next-Lab Preparation
Git Push
git push origin branchNameTopic : Working with a Text and Listin HTML
1) Power of HTML text tags
2) Customizing your style with CSS
3) Listing it right using HTML
4) HTML Link up , attributes of tag, block vs inline elements
Text box Width : 887
Business Scenario, Pre-lab Preparation, Next-lab Preparation, Task, Activity, Checkpoint : 90%.
Steps : 1,2,3 [Sub Steps - a,b,c]
Normal Text, Topic Name : 80%
Subtopic : 70%
Code Box font Size : 16px